If you've walked through the halls of ICMS recently, you may have noticed the beautiful works of art completed by 7th and 8th graders that inhabit the display cases. Praises from parents and teachers alike have been pouring in over these masterpieces!
For every project that the students do in my class, I like to do a 'quality sample', an example of what I want them to shoot for in their own art. The sample gives me an opportunity to see the challenges that the students may face with the medium, to demonstrate various techniques and to give those visual learners a goal to aspire towards. Often times, when showing the students the samples, I hear comments like these;
"No way can we do that!", "It's easy for you, you're an artist, Ms. Bullers!", "You've got to be kidding us, right?!"
There is the part where I tell them that they WILL do the same thing beautifully and successfully because I KNOW that they are capable!
Some lesson plans I make up myself; I like to think of lesson planning as MY form of art. Others I get from varying sources. This particular lesson plan, I found on the internet and I thought it to be brilliant.
It's easy to get a good reaction from students when you show them the work of Gustav Klimt. The numerous shapes, unique patterns, intricate designs and well-crafted gold leaf applications in Klimt's turn of the century Art Nouveau works captures the admiration of many. The Kiss (1907–1908)and Portrait of Adele Bloch-Bauer I (1907) are some of his most famous paintings from this Austrian symbolist painter's 'Golden Phase'.
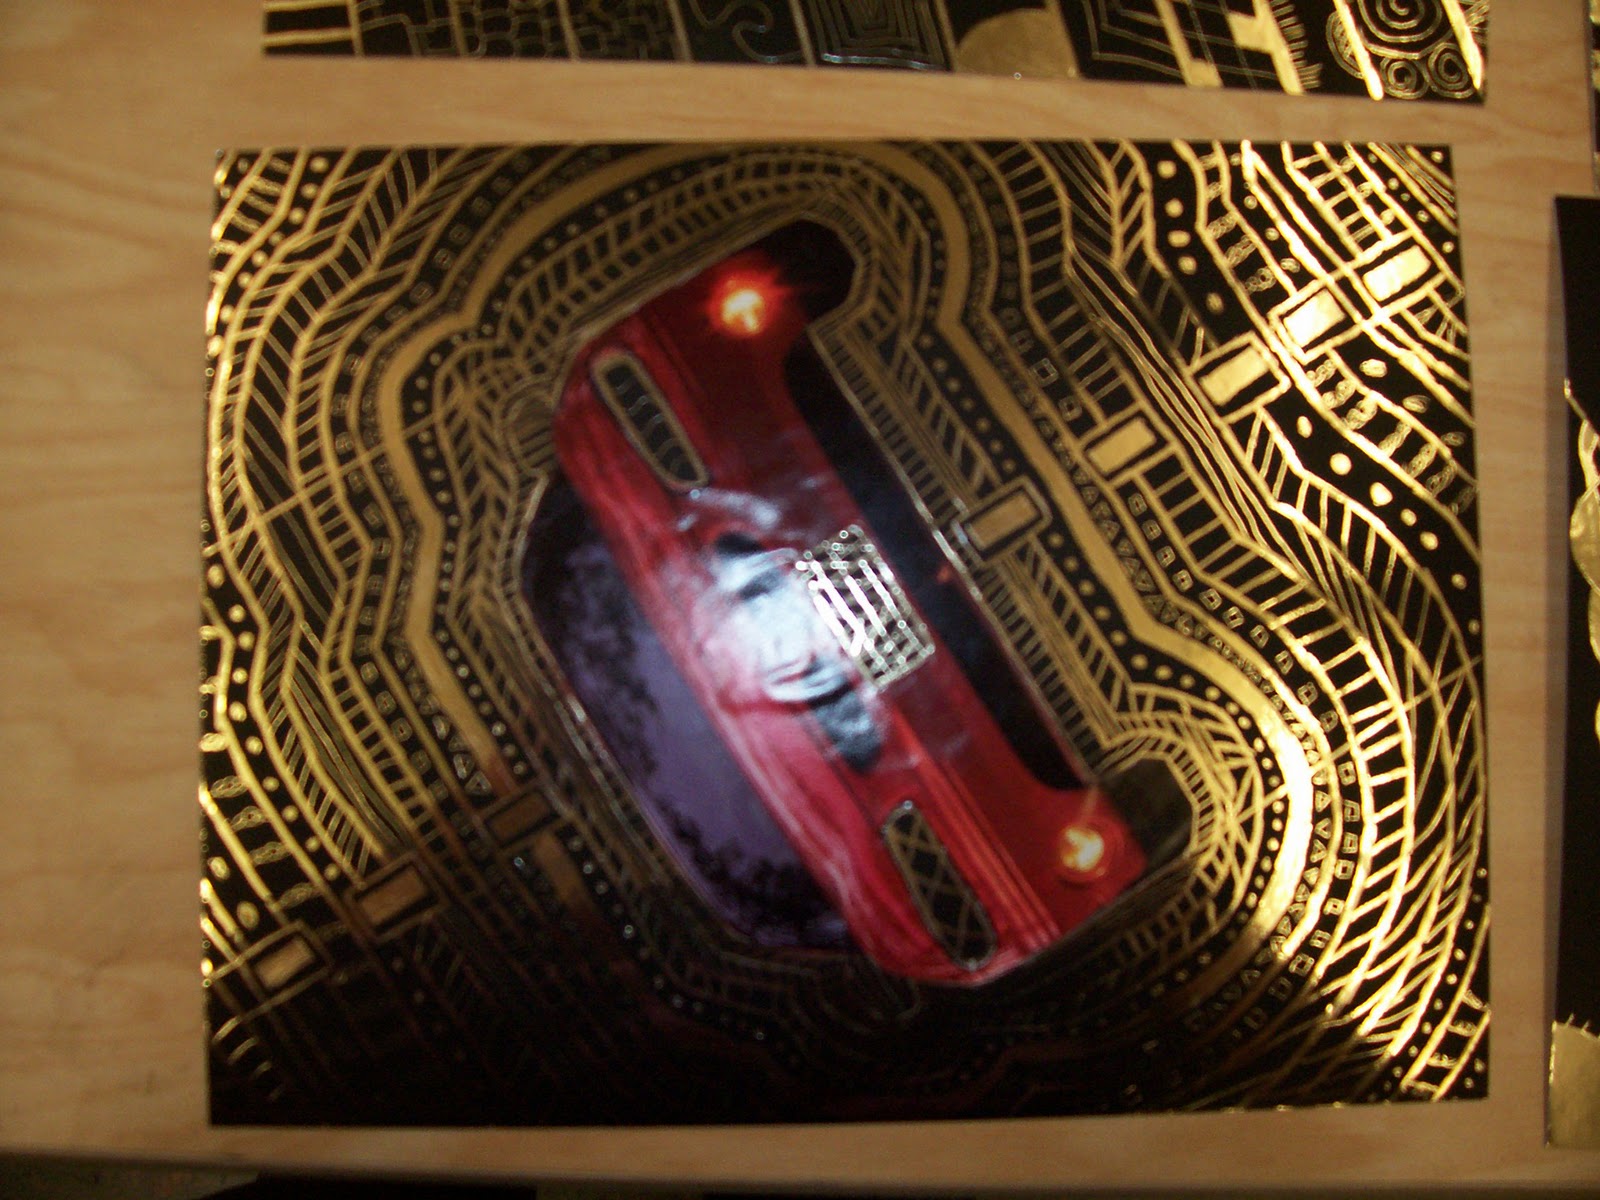
To incorporate the same effect of patterns with gold leaf, the students used an art medium called scratch board. Scratch board is essentially a piece of cardboard with a thin layer of India ink that is scratched into with a sharp tool to reveal a layer of golden foil underneath.
Each student chose an image from a magazine that they liked, cut it and glued it to the surface of their scratch board. Then, they were to scratch in some piece that was missing from their image. For example, Gustav Klimt would often paint realistic faces onto his canvas and then finish their clothing with pattern gold leaf. Finally, the students broke up the background of their scratch boards with beautifully intricate patterns.
Sunday, January 2, 2011
Tuesday, November 23, 2010
Keith Haring: Elements of Art 6th grade project
When I first bring up the artist, Keith Haring, most peoples' faces go blank. If I then show them a piece of his artwork, such as, 'Radiant Baby', I usually hear an, "Ah ha! That looks familiar!"

His artwork became a sort of brand, when he began doing advertisements for various products. Even though Haring is no longer living, I've noticed many ads that are still heavily (if not, downright theiving!) influenced by his work. Haring, who some have labeled the 'Godfather of Graffiti Art', started out on a criminal path. He was arrested several times for his early graffiti chalk drawings on the subway walls of New York City. Eventually, he was asked to create paintings and sculptures for galleries and became a well known artist for his time. Haring became a social activist with his artwork, often times working with children and communities to raise money for AIDS organizations and children's programs. Sadly, Haring died an early death at age 32 of complications relating to the AIDS virus.
Students usually are excited anytime I show them works of graffiti art, but most of them only have the idea of illegal 'taggers' in their heads. I love to show them Keith Haring, because he became a legitimate artist and also because his art is not always what we think of when we hear the word, 'graffiti'. For this lesson, the students were to create their own 'symbol' in the style of Keith Haring. I urged them to either; add arms and legs, halos, fire or wings to inanimate objects (these are methods of symbolism that Haring often used) and to use a shape that could be made into a stencil and traced. When each student finished their posterboard paper stencil, they traced around it in four different squares of a square paper. I incorporated some of the Elements of Art into this project by having them do; ink lines for LINE, a construction paper shape for SHAPE, the use of a texture plate rubbing for TEXTURE and by painting the negative space for SPACE. We had some very unique art come out of this project. Take a look!

His artwork became a sort of brand, when he began doing advertisements for various products. Even though Haring is no longer living, I've noticed many ads that are still heavily (if not, downright theiving!) influenced by his work. Haring, who some have labeled the 'Godfather of Graffiti Art', started out on a criminal path. He was arrested several times for his early graffiti chalk drawings on the subway walls of New York City. Eventually, he was asked to create paintings and sculptures for galleries and became a well known artist for his time. Haring became a social activist with his artwork, often times working with children and communities to raise money for AIDS organizations and children's programs. Sadly, Haring died an early death at age 32 of complications relating to the AIDS virus.
Students usually are excited anytime I show them works of graffiti art, but most of them only have the idea of illegal 'taggers' in their heads. I love to show them Keith Haring, because he became a legitimate artist and also because his art is not always what we think of when we hear the word, 'graffiti'. For this lesson, the students were to create their own 'symbol' in the style of Keith Haring. I urged them to either; add arms and legs, halos, fire or wings to inanimate objects (these are methods of symbolism that Haring often used) and to use a shape that could be made into a stencil and traced. When each student finished their posterboard paper stencil, they traced around it in four different squares of a square paper. I incorporated some of the Elements of Art into this project by having them do; ink lines for LINE, a construction paper shape for SHAPE, the use of a texture plate rubbing for TEXTURE and by painting the negative space for SPACE. We had some very unique art come out of this project. Take a look!Tuesday, November 9, 2010
PARENTS/STUDENTS!! Art to Remember-DUE NOW!!
Art to Remember packets are (technically) tomorrow (Wednesday, November 10th). If you can't get them to me til Thursday or Friday, I will still be accepting them.
If you aren't ordering, please send the packets with the artwork back as well. I would like to document the students' work.
Thank you so much for your cooperation, parents!!
Please email me if you have any questions or concerns:
jbullers@ics-charter.org
If you aren't ordering, please send the packets with the artwork back as well. I would like to document the students' work.
Thank you so much for your cooperation, parents!!
Please email me if you have any questions or concerns:
jbullers@ics-charter.org
Tuesday, November 2, 2010
Art to Remember DUE DATES!!
Hey Parents/Guardians!
I need your help! I sent home the order packets for Art to Remember with your student at the end of last week. Your student should have shown you their artwork and the brochure that came with the packet that has all the different items you can order their art imprinted on.
If you would like to order something, please fill out the order form completely and send the entire packet (artwork, order form and payment by check or cash) back to school with your student.
If you DO NOT want to order something, please send the entire packet back with artwork inside. Why? I would still like to document your student's work, hang it in our hallways and put it on the blog!
All packets need to be back by NOVEMBER 10th in order to be sent in with the first order. If I must send in late orders, I will, but they will not come in before the holidays.
If you have any questions, please feel free to email me at jbullers@ics-charter.org
Sincerely,
Ms. Bullers
I need your help! I sent home the order packets for Art to Remember with your student at the end of last week. Your student should have shown you their artwork and the brochure that came with the packet that has all the different items you can order their art imprinted on.
If you would like to order something, please fill out the order form completely and send the entire packet (artwork, order form and payment by check or cash) back to school with your student.
If you DO NOT want to order something, please send the entire packet back with artwork inside. Why? I would still like to document your student's work, hang it in our hallways and put it on the blog!
All packets need to be back by NOVEMBER 10th in order to be sent in with the first order. If I must send in late orders, I will, but they will not come in before the holidays.
If you have any questions, please feel free to email me at jbullers@ics-charter.org
Sincerely,
Ms. Bullers
Sunday, October 24, 2010
Art to Remember (PARENTS! PLEASE READ!)
All three grades at ICMS are currently working on a project that is mainly based on drawing from images. The 6th graders are either working on lighthouses or insects (don't ask....we tried to have a vote, but it was split, so I let them have the choice!). The 7th and 8th graders are working on close ups of flowers or plants (many of them tropical) OR a landscape. Let me just say, that they are coming out beautifully!
The unique thing about this project is what we can do with the final works of art. This project will be used for our art department fundraiser.
Art to Remember is an Indianapolis based company that turns your child's artwork into high-quality keepsakes. Soon, you will receive a packet with your child's artwork and an order form so you can choose from a variety of different items, such as coffee mugs, bookmarks, magnets, pillows, to have your student's work forever imprinted upon.
Another great thing about this company is that it will provide funding for ICMS's art department! Let's face it, every time a fundraiser ends, it seems another pops up. But, Art to Remember is different.
Family and friends will cherish these creative keepsakes made by their loved ones for years to come. Just in time for the holidays!
The unique thing about this project is what we can do with the final works of art. This project will be used for our art department fundraiser.
Art to Remember is an Indianapolis based company that turns your child's artwork into high-quality keepsakes. Soon, you will receive a packet with your child's artwork and an order form so you can choose from a variety of different items, such as coffee mugs, bookmarks, magnets, pillows, to have your student's work forever imprinted upon.
Another great thing about this company is that it will provide funding for ICMS's art department! Let's face it, every time a fundraiser ends, it seems another pops up. But, Art to Remember is different.
Family and friends will cherish these creative keepsakes made by their loved ones for years to come. Just in time for the holidays!
Art Site Links!!
On the left hand side of this blog, I've posted several links to various art websites that are fun for kids (or anyone!).
For example, Odo Sketch allows you to use a special tool to draw online. This is no ordinary draw program! On Odo Sketch, you can layer colors and show value! You can also save your work so that others can see it online. When you click on your finished drawing (or others' finished work), Odo Sketch plays your whole creative process in fast forward!
Another great site is FreeRice, a learning tool that donates 10 grains of rice (for every correct question answered) through the World Food Programme to help end hunger. Not only is this website fun and a great way to learn art history (or math or science, etc), but it's helping people in need!
Do you like to investigate and explore things? Try out Lifetime of Color's "Color Theory vs. Dr. Gray" or "The Art of Crime Detection." This website is full of fun games that teach you about the elements and principles of art.
Do you see yourself as a future comic book artist? Or at least a comic book connoisseur? Then you should check out Make Beliefs Comix! You can create your own comic strip by choosing various characters with various expressions. Want to impress Mrs. Epple? Translate your comic into Spanish (or one of 7 different languages!).
Go! Have fun! Explore! (Just make sure you do your homework FIRST!!)
For example, Odo Sketch allows you to use a special tool to draw online. This is no ordinary draw program! On Odo Sketch, you can layer colors and show value! You can also save your work so that others can see it online. When you click on your finished drawing (or others' finished work), Odo Sketch plays your whole creative process in fast forward!
Another great site is FreeRice, a learning tool that donates 10 grains of rice (for every correct question answered) through the World Food Programme to help end hunger. Not only is this website fun and a great way to learn art history (or math or science, etc), but it's helping people in need!
Do you like to investigate and explore things? Try out Lifetime of Color's "Color Theory vs. Dr. Gray" or "The Art of Crime Detection." This website is full of fun games that teach you about the elements and principles of art.
Do you see yourself as a future comic book artist? Or at least a comic book connoisseur? Then you should check out Make Beliefs Comix! You can create your own comic strip by choosing various characters with various expressions. Want to impress Mrs. Epple? Translate your comic into Spanish (or one of 7 different languages!).
Go! Have fun! Explore! (Just make sure you do your homework FIRST!!)
Sunday, October 17, 2010
6th Grader's Wallpaper "Quilts" (a lesson in measurement!)
Often times, the visual art world gets wrapped up in using terms such as 'high art' (paintings and sculptures that we might find in a gallery or museum) and 'low art' (crafts such as embroidery, knitting, quilting, woodworking that might be done as a hobby). But, much of what is considered 'low art' has been in the high art zone in the past (think Ming Dynasty porcelain) and many contemporary artists are currently working to uplift low art so it can be viewed as legitimate fine art. Quilting is an art form because it takes creativity and skill. Many may just call it a craft because a quilt is usually meant to be used (for warmth and comfort) and not hung on a museum wall.
When introducing this lesson, I made sure to point out to the 6th graders that the IMA displays a whole section of beautifully crafted quilts on their gallery walls. We also looked at images of a new(er) type of quilt that is ONLY intended for the wall of a gallery or museum. These 'paintings in textiles' are just simply called 'art quilts'. After gaining an appreciation for the 'high art' of quilting, I turned the lesson back to the basics of quilting and the parts of a quilts, because all forms of art need to start at the basics! Each student received a worksheet with a similar block pattern, but was able to choose between seven different patterns that could be used on the one block. After they chose their patterns, they knew how many different 'textiles' (we used wallpaper samples!) they needed to follow their chosen pattern. Each student then went to work on measuring and checking measurements and Remeasuring and Rechecking measurements until they were certain that their measurements were correct. And then we checked them again! It was a daunting task for many of the students, but I can gladly say that I have a six grade group that are now masters of the ruler! From there, they cut and glue their pieces onto their block by following their pattern. Then, they glued their block onto the 'backing' (poster board) and we 'sewed' (hole punched and wove yarn) all the blocks together. This was such a fun project! I especially loved seeing the students work together at the end to put their quilts together so that the blocks worked together for an allover class piece.
Subscribe to:
Posts (Atom)